Products Category
- FM Transmitter
- 0-50w 50w-1000w 2kw-10kw 10kw+
- TV Transmitter
- 0-50w 50-1kw 2kw-10kw
- FM Antenna
- TV Antenna
- Antenna Accessory
- Cable Connector Power Splitter Dummy Load
- RF Transistor
- Power Supply
- Audio Equipments
- DTV Front End Equipment
- Link System
- STL system Microwave Link system
- FM Radio
- Power Meter
- Other Products
- Special for Coronavirus
Products Tags
Fmuser Sites
- es.fmuser.net
- it.fmuser.net
- fr.fmuser.net
- de.fmuser.net
- af.fmuser.net ->Afrikaans
- sq.fmuser.net ->Albanian
- ar.fmuser.net ->Arabic
- hy.fmuser.net ->Armenian
- az.fmuser.net ->Azerbaijani
- eu.fmuser.net ->Basque
- be.fmuser.net ->Belarusian
- bg.fmuser.net ->Bulgarian
- ca.fmuser.net ->Catalan
- zh-CN.fmuser.net ->Chinese (Simplified)
- zh-TW.fmuser.net ->Chinese (Traditional)
- hr.fmuser.net ->Croatian
- cs.fmuser.net ->Czech
- da.fmuser.net ->Danish
- nl.fmuser.net ->Dutch
- et.fmuser.net ->Estonian
- tl.fmuser.net ->Filipino
- fi.fmuser.net ->Finnish
- fr.fmuser.net ->French
- gl.fmuser.net ->Galician
- ka.fmuser.net ->Georgian
- de.fmuser.net ->German
- el.fmuser.net ->Greek
- ht.fmuser.net ->Haitian Creole
- iw.fmuser.net ->Hebrew
- hi.fmuser.net ->Hindi
- hu.fmuser.net ->Hungarian
- is.fmuser.net ->Icelandic
- id.fmuser.net ->Indonesian
- ga.fmuser.net ->Irish
- it.fmuser.net ->Italian
- ja.fmuser.net ->Japanese
- ko.fmuser.net ->Korean
- lv.fmuser.net ->Latvian
- lt.fmuser.net ->Lithuanian
- mk.fmuser.net ->Macedonian
- ms.fmuser.net ->Malay
- mt.fmuser.net ->Maltese
- no.fmuser.net ->Norwegian
- fa.fmuser.net ->Persian
- pl.fmuser.net ->Polish
- pt.fmuser.net ->Portuguese
- ro.fmuser.net ->Romanian
- ru.fmuser.net ->Russian
- sr.fmuser.net ->Serbian
- sk.fmuser.net ->Slovak
- sl.fmuser.net ->Slovenian
- es.fmuser.net ->Spanish
- sw.fmuser.net ->Swahili
- sv.fmuser.net ->Swedish
- th.fmuser.net ->Thai
- tr.fmuser.net ->Turkish
- uk.fmuser.net ->Ukrainian
- ur.fmuser.net ->Urdu
- vi.fmuser.net ->Vietnamese
- cy.fmuser.net ->Welsh
- yi.fmuser.net ->Yiddish
How do I use the FM transmitter on a drive in movie?

I know there are already instructions for drive in theaters in instructables. It was thanks to the FMUSER.net,I got the drive in bug. I feel that this instructable will add a lot to the Drive-In Theater arsenal.
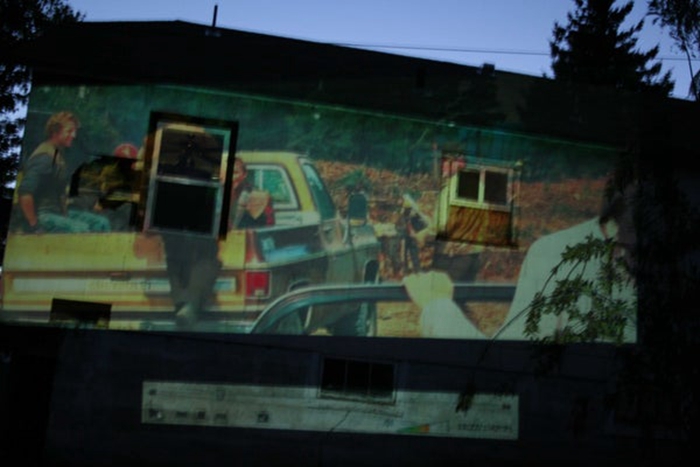
I wanted this screen to be seen from both sides, so that I could have people watch from a camp fire from the back and from their cars from the front. For the audio I used an fm transmitter elevated ten feet off the ground. The screen was made from two twin sheets sewn together.To accomplish this project I needed:Cheap old bright projector,2 twin sheets,Rope,Stakes, Fm transmitter,Radios.
Step 1: The Projecter
Projectors are rated in 3 big categories, resolution, brightness, and contrast. I figured resolution was not a big deal, mostly because I was not projecting onto a good surface and was going to show old low resolution videos. Brightness is measured the same way as flashlights, with lumens. The more lumens the projector has the brighter it is. The last category, contrast, is hard to measure because there is no standard method to measure it. For reference old drive-in theaters had a contrast of about 800:1 but some of the new projectors advertise contrast ratios of 2000:1. The contrast is the difference between the darks and the lights. It is not as good but I used the contrast settings in my video player to compensate for the projectors lower contrast ratio.
Step 2: The Screen
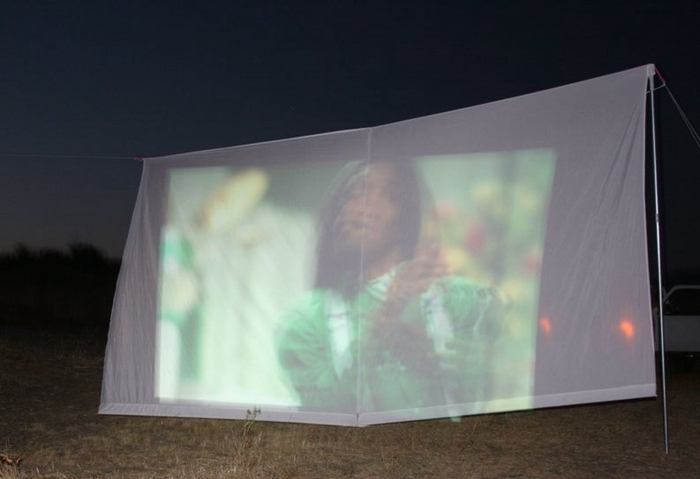
Using sheets is not usually the best method for drive-in screens but in this application it was the easiest way to for the projector to shine through the screen so that it was visible on both sides. To make the screen I sewn 2 sheets together, at the top and bottom I sewed straps so that I could tie it to the post and stake it to the ground. It is a little hard to explain how I sewed the screen so look through the pictures. The straps are folded over so that the screen is inside. To sew the 2 sheets together I cut off the folded edges because they were too thick. I sewed the 2 sheets with a straight stitch all the way down, cut off the extra material, then used a very zigg-zagged stitch to tighten in the loose edge so that it wouldn’t unravel.Inside the bottom seam I was able to insert some PVC pipe to keep it ridged.
Step 3: FM Transmitter and Radios
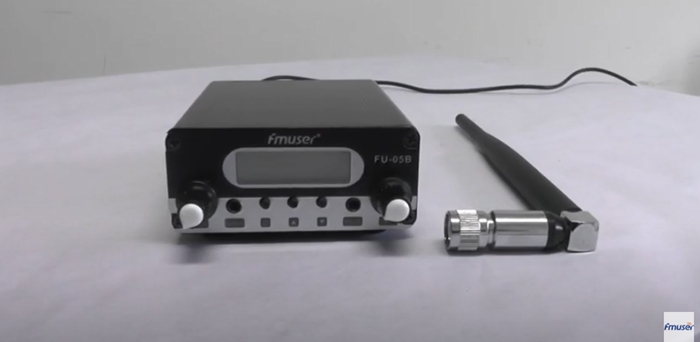
I used the historic https://www.fmuser.net/FM Transmitter, anything I found better a lot more and not needed a radio license. However I had more radio problems than expected. I was exciting with broadcast range of the transmitter, I found to get the best distance the transmitter needed to be raised 10 above the ground. I also wanted to place radios around the yard and house so that it was easy to listen to. I had the fm transmitter and a speaker plugged into my laptop and other boom boxes, and radios scattered around when I noticed that the analog radios were faster then the digital radios. For example my Zune and Walkman mp3 players both have fm tuners in them but when sitting next to an old boom box or cheap fm radio they lagged almost 2 seconds behind. To fix the problem I put the lagging radios inside where they couldn’t be over heard.
Step 4: Yard Layout

Step 5: Movie Ideas